Index
Configuring SecureCRT and SecureFX for 2FA Smartcard Authentication (RFC 6187)
If your SSH2 server environment is properly configured for X.509 smartcard
certificate authentication, then you can configure SecureCRT/SecureFX to authenticate
using 2FA certificates on your smartcard.
Here are the general steps you would take to configure SecureCRT/SecureFX for Windows
to accomplish authentication using your smartcard:
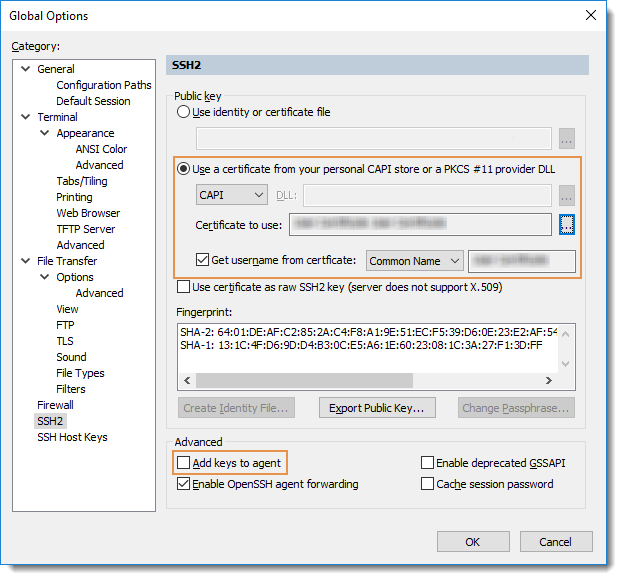
- Open Global Options and select the SSH2
category.
- In the Public key section, enable the Use a certificate from your personal
CAPI store or a PKCS #11 provider DLL option.
- Insert your smartcard.
- For the Certificate to use field, press the [...] button to the right and
browse through the available certificates.
- If your certificate contains the user account name that should be used for
authentication, enable the Get username from certificate option; then
specify the certificate field that contains the account name required for
smartcard authentication to your SSH2 servers (either Principal Name or
Common Name).
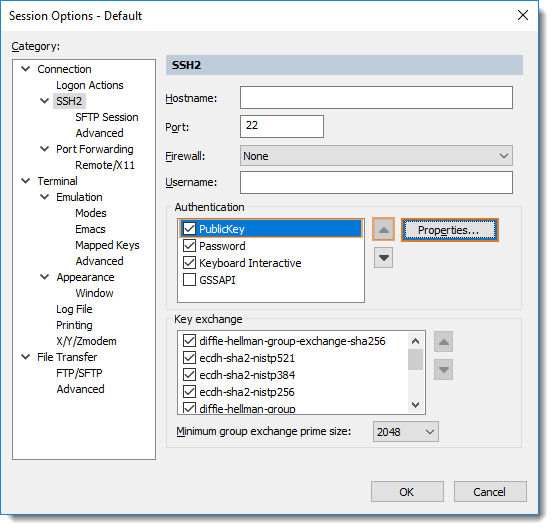
However, if your certificate does NOT contain the user account name that should be used for authentication to the SSH server, then you should NOT enable the Get username from certificate option. Instead, you should specify the required user name in the Username field in the SSH2 category of the Session Options window.
- Disable the Add keys to agent option in the Advanced section below the fingerprint viewing area.
- Press the OK button to save your configuration changes.
Once you have made the above changes to SecureCRT's Global Options, you are now prepared to set up a session to use smartcard authentication.
If you want to use the selected certificate for all or most of your connections, edit the Default session to use the global public key configuration you've just configured above:
- Choose Options / Configure / Edit Default Session…
- Select the SSH2 category, and in the Authentication list to the right, highlight the PublicKey authentication method and move it to the top of the list.
- With the PublicKey authentication method still selected in the Authentications list, press the [Properties…] button.
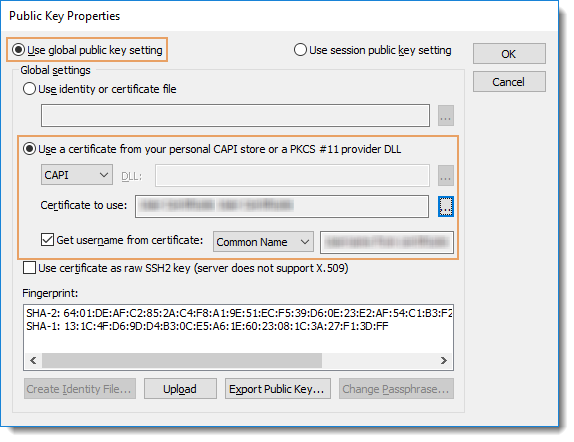
- In the Public Key Properties window, enable the Use global public key setting option and note the information matches what you had specified in the Global Options, SSH2 category earlier.
Reminder: If the user account name that you need to use for authentication to most of your SSH2 server is NOT the same as the name from your certificate, you should not enable the Get username from certificate option. Instead, you should specify the required user account name in the Username field in the SSH2 category as seen below the Firewall field in the graphic above.
- Press the OK button to close the Public Key Properties window.
- Press the OK button to close the Session Options window.
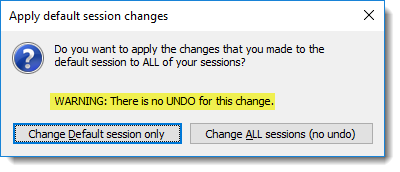
- When prompted to "Apply default session changes" to all of your existing sessions or just to the Default session, please note that there is no undo for this action if you choose to make this change to all of your sessions.
If you will be authenticating with smartcard certificates for the majority of your connections, then you should consider making the change to all of your sessions.
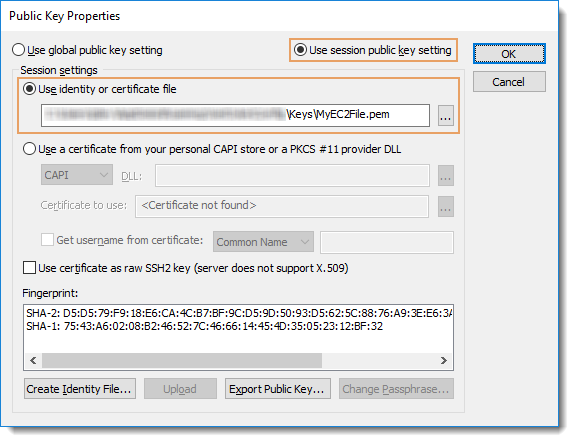
If you already have saved sessions that have been configured to authenticate with public-key authentication NOT from your smartcard and you desire to have these remain in place, you will need to edit those individual saved sessions to restore the session-specific public-key settings (configure those with the Public Key Properties such that the Use session public key setting is enabled, rather than the global as shown in the graphic below).
Notes:
As configured above, SecureCRT/SecureFX do not cache your smartcard PIN. The first time you authenticate with a certificate on your smartcard, you will be prompted for the PIN by MS CAPI or your smartcard's middleware provider. If subsequently you are not prompted for your PIN when authenticating with the smartcard, it is because your PIN has been cached by your smartcard's middleware. Consult your smartcard middleware documentation on how to disable PIN caching.
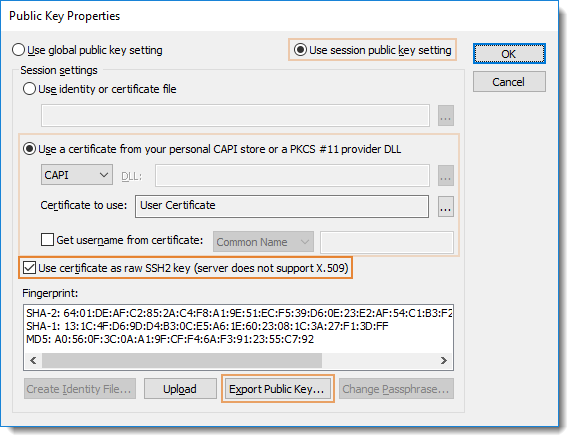
In some cases, an individual may desire to use the certificate's private key from their smartcard to authenticate to a remote SSH2 host that does not support certificate authentication as per RFC 6187, but the remote host does support standard/raw SSH2 public-key authentication. You can achieve raw SSH2 public-key authentication with the private key on your smartcard if you modify the corresponding saved session in SecureCRT to enable the Use certificate as raw SSH2 key option.
To extract the public key (.pub) file needed to configure the remote SSH2 server to accept your key for authentication, press the [Export Public Key...] button. Then follow the instructions for the specific SSH2 server on the remote host as to how to apply that public key for use by your user account on the remote host.
Troubleshooting Tips
- Many smartcards contain a number of different certificates. Make sure you specify the correct certificate from your smartcard that the SSH2 server is expecting you to use for authentication.
- When configuring a session that will use smartcard authentication, you may have to specify the host in FQDN format (Fully Qualified Domain Name). For instance, without smartcard authentication, "host" might have worked, but with smartcard authentication "host.mydomain.com" may be required.
- Enabling Trace Options from the File menu will help you to see the SSH2 negotiation that is occurring between the client and the SSH2 server. This information will include the fingerprint of certificates as authentication is attempted, which will help you to determine which certificate on your smartcard is being used (match the fingerprint to your certificate's thumbprint).
- Many SSH2 servers are configured to treat unsigned public-key authentication attempts as failures, disconnecting clients after only a small number of failures (e.g., 3). If your smartcard has multiple certificates, you will need to specify the exact certificate to use, instead of having SecureCRT/SecureFX configured to
<try all certificates> on your smartcard.
- VanDyke Software's technical support team can help with SecureCRT/SecureFX configuration and troubleshooting. Please provide your trace options debug log (for an overview on how to do this, see the SecureCRT Trace Options Debug Logging YouTube video) via email to along with a description of the issue you are facing. Please do not post trace options debug log information to these or any other public forums.
Administrative Option
There is an administrative option that can be applied via Group Policy that will force connections to be disconnected when a smartcard is removed. For more information about this GPO policy as it can be applied to VanDyke Software clients such as SecureCRT and SecureFX, please contact .