Introduction
In file transfer scenarios, there are times when both the sender and the receiver want evidence that the file being transferred has been received and written to the recipient's file system without corruption or tampering.
The SFTP protocol is implemented over an SSH2 transport, which ensures data integrity of a file while in transit between client and server.
But what if you want to provide another means of verification?
This tip describes a solution that uses VShell as a file transfer server configured with a trigger that will:
Design Overview
The goal is to provide both the client and the server with a way to verify the integrity of a data file that has been uploaded from the client to the server.
The design decisions outlined below provide one example of how to achieve this goal:

The following describes this process in detail:
Before uploading any data file, the client will first generate a hash file containing a hash value of the data file's contents.
This hash file has the following format:
hash_algorithm (file_name) = file_hash_result
The sha256sum (https://man7.org/linux/man-pages/man1/sha256sum.1.html) command-line utility available on an Ubuntu machine provides this format (using the SHA2-256 hashing algorithm) when the -tag command-line option is supplied. For example:
$ sha256sum -tag DataFile.dat > DataFile.dat#client_hash#.txt
$ cat DataFile.dat#client_hash#.txt
SHA256 (DataFile.dat) = 179dcc5ace4b7f4b1ffd02c65d33fb01b9ae7053e8e294e3a9a30b7244c1411d
Configuration Overview
The configuration in this scenario involves two machines:
A Windows machine on which VShell has been installed.
VShell is configured with a file upload trigger. This trigger fires off a command whenever a file upload event completes. This trigger command launches a powershell script, ValidateFileReceivedByHashComparison.ps1.txt. The powershell script accepts arguments that control specific script behaviors.
An Ubuntu machine on which the scp and sha256sum command-line utilities are available by default.
A shell script, upload-file-with-hash.txt, facilitates the client-side steps of generating the hash file, uploading both the data file and the hash file, downloading the server-generated hash file, and comparing the two hash values.
Windows VShell Configuration
Here are the steps for setting up VShell on your Windows machine.
Download VShell for Windows.
This is a free download that will provide you with an initial evaluation period. If you want to continue to use VShell beyond the evaluation period, simply purchase a license and apply your license data to your existing installation.
Install VShell.
This is a straightforward process that involves running the VShell InstallShield Wizard, clicking a few Next buttons, followed by Install, then Finish. Administrator access is required to install VShell.
Reboot the Windows machine following your install.
Rebooting allows Windows to load the public-key authentication module. If you only want to provide password authentication, you can defer the reboot until you need public-key authentication.
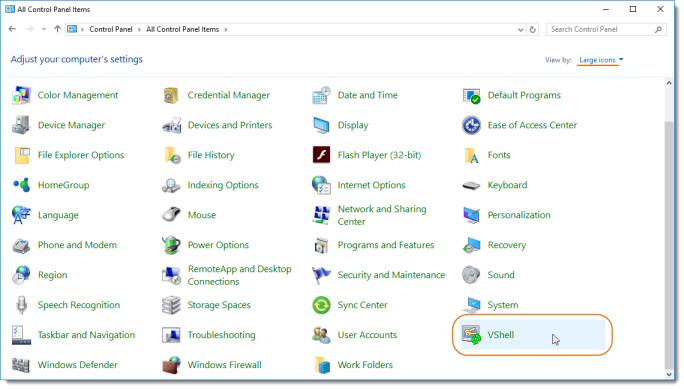
Configure VShell.
Configuration of VShell is done through the VShell Control Panel applet. VShell places the applet in the Windows Control Panel area, but you can also launch it directly by running VShellCP.exe (found in VShell's program files location).
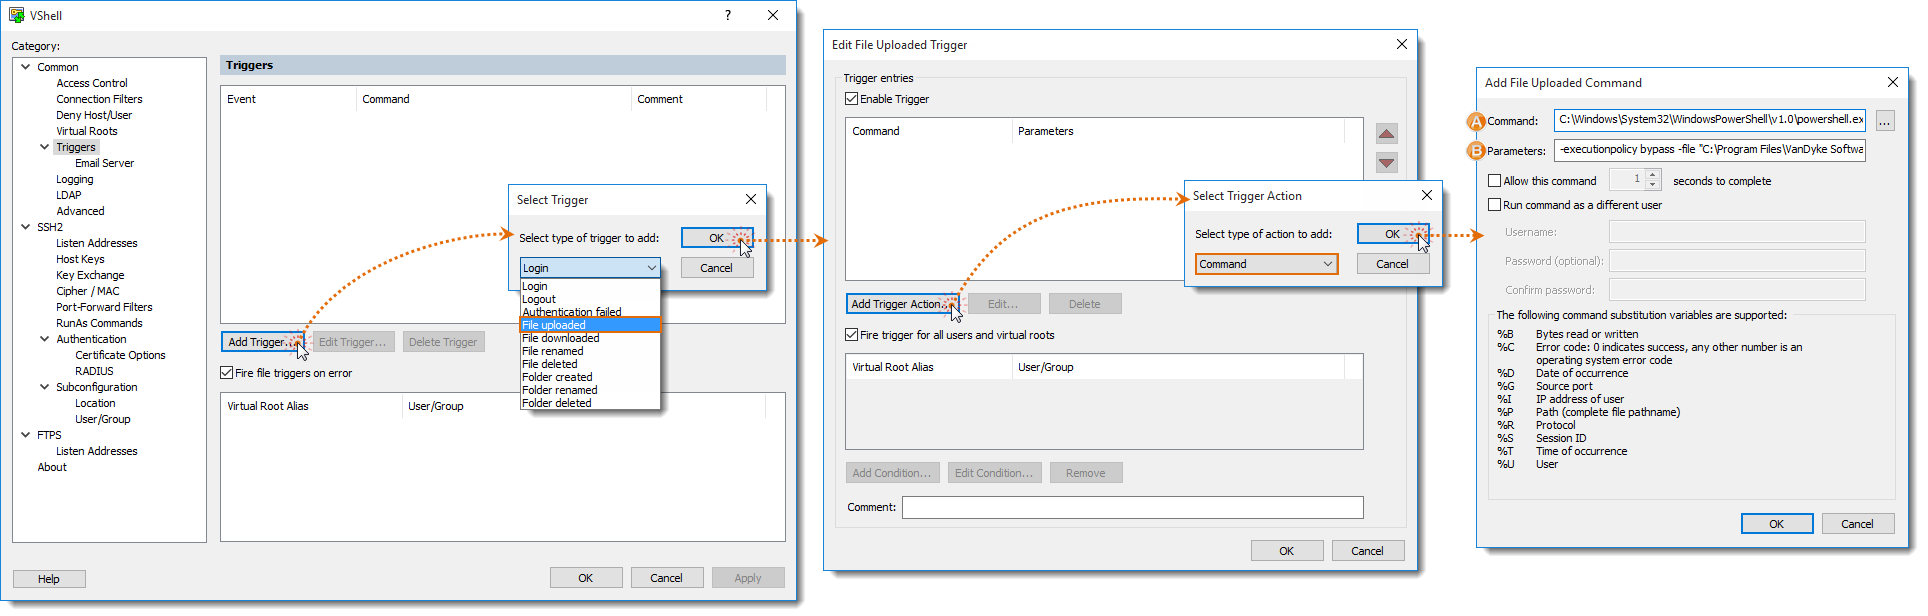
C:\Windows\System32\WindowsPowerShell\v1.0\powershell.exe
-executionpolicy bypass -file "C:\Program Files\VanDyke Software\VShell\ValidateFileReceivedByHashComparison.ps1" -file %P -admin_email admin@example.com -client_email client@example.com -client_ip %I -client_username %U
Ubuntu Client-Side Configuration
By default, Ubuntu comes with the scp client, as well as the sha256sum command-line utility. If your Ubuntu
machine does not have scp or sha256sum installed, you can download these free of charge from an open source
software site.
Below are configuration steps on the client side that will facilitate ease of use.
Use a shell script to do all the client-side work of creating the hash file, uploading the data file, uploading the hash file, downloading the server's hash file, comparing the values, etc.
You can download the example shell script, upload-file-with-hash.txt, that does this work.
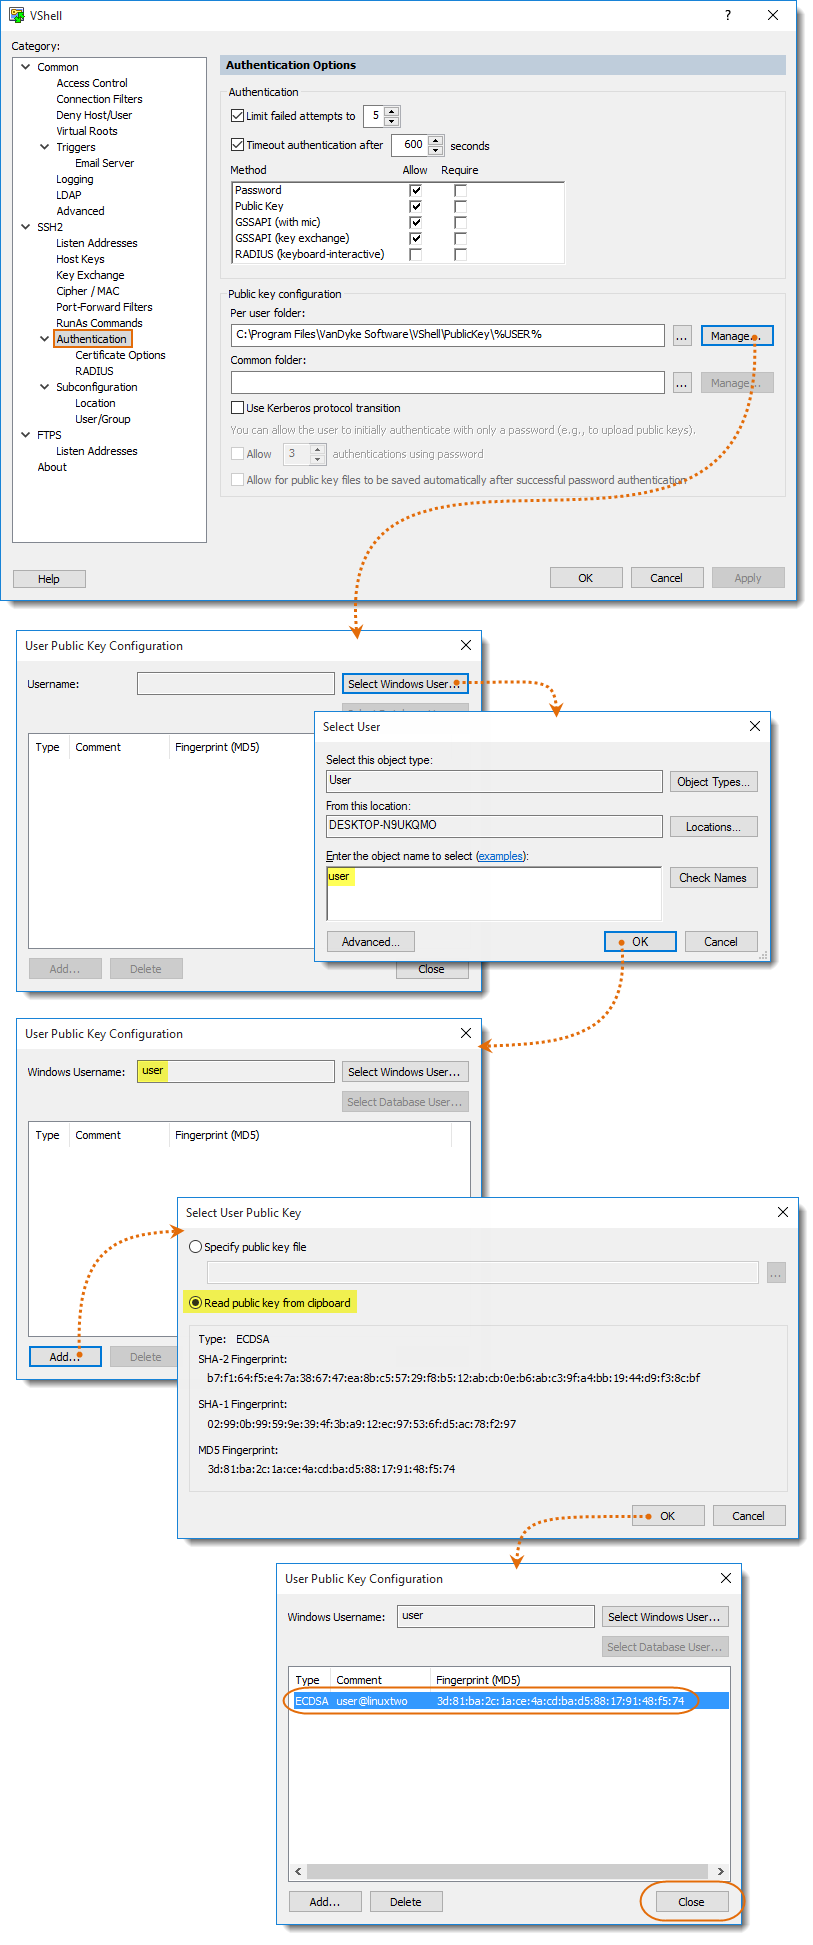
Note: When prompted for a passphrase for your private key, leave it blank and press Enter.
$ cd ~/.ssh
$ ssh-keygen -t ecdsa -b 521
Generating public/private ecdsa key pair.
Enter file in which to save the key (/home/user/.ssh/id_ecdsa):
Enter passphrase (empty for no passphrase):
Enter same passphrase again:
Your identification has been saved in /home/user/.ssh/id_ecdsa.
Your public key has been saved in /home/user/.ssh/id_ecdsa/pub.
The key fingerprint is:
SHA256:t/Fk9eR6OGdH6ovFVyn4tRKryw62q80fpLsZRNnzjL9
$ cat id_ecdsa.pub
ecdsa-sha2-nistp521 AAAAE2VjZHNhLXNoYTItbmlzdHA1MjEAAAAIbmlzdHA1MjEAAACFBAElGn8qCSi7nOLR6hljvqXg+JjmctwEQW1cwAMGZTHikafersFiB6eAkySpjYCPZGaE0VgVD/9LEhEgIS3NkeOfdQD2ru7T7J6+wi0yM+hOrZ4RgCj9x5kbXijibXCLvTVupHwhOm68wHk+XOO5ArtlDIu33DwSjCncJbvQBsd5fvw2Tg== user@linuxtwo
Copy and email the id_ecdsa.pub file to the VShell administrator.
The VShell administrator will either:
Testing the Client and Server Configuration
Once both the Windows VShell server machine and the Ubuntu client machine have been configured, testing can begin.
To test the success case, log onto the Ubuntu client machine and run the example upload-file-with-hash shell script, passing in as arguments the name of the file you wish to upload and a user@host:dir specification representing the VShell Windows machine as the desired destination. For example:
./upload-file-with-hash DataFile.dat user@192.168.244.22:./
To test the failure case, run the same example shell script on the Ubuntu machine, but with the --test-failure command-line option, which will simulate a failure by uploading a hash file that has extra data appended so that the hash file is different than expected. For example:
./upload-file-with-hash --test-failure DataFile.dat user@192.168.244.22:./
VanDyke Software uses cookies to give you the best online experience. Before continuing to use this site, please confirm that you agree to our use of cookies. Please see our Cookie Usage for details.